Wix Accessibility: Tabnav Widget Integration Guide
Quick Start
In this guide, we'll lead you through 4 straightforward steps to implement the Tabnav AI accessibility widget on the Wix platform. Please ensure you have the Tabnav AI widget code ready and access to your desired website's management area to implement the widget.
Step
First, log in to your Tabnav Dashboard and download the snippet code.
*If you have multiple sites, you can use the same JavaScript across all of them as long as they belong to the same project.
Step
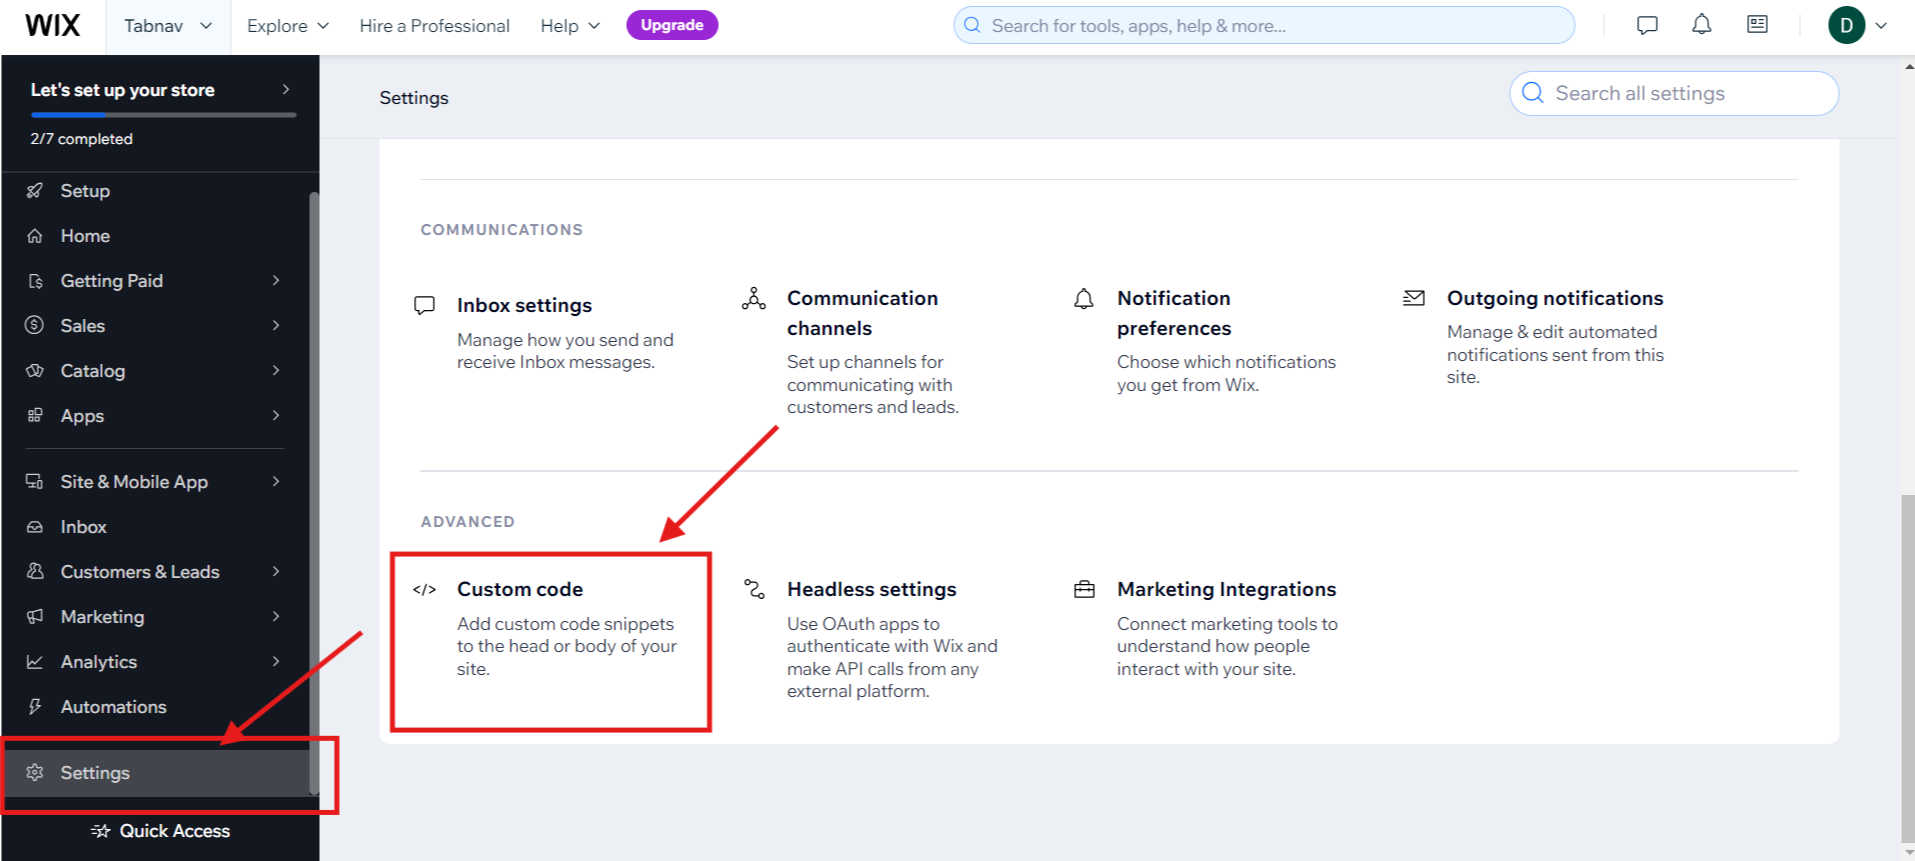
Log in to your Wix Dashboard. On the left-side navigation panel, select "Settings". Then, on the new page that opens, scroll down and select the "Custom Code" .
Step
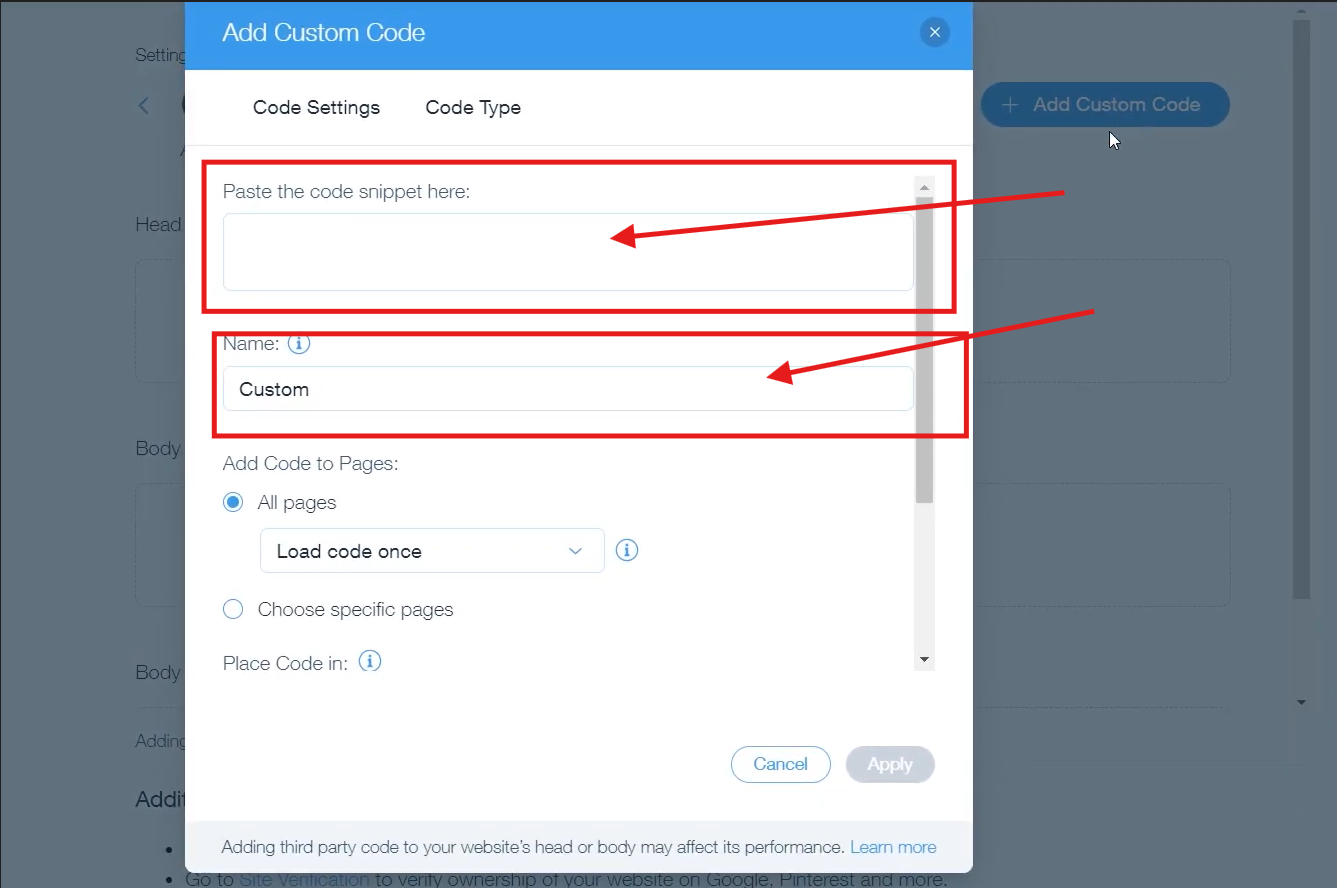
On the new page that opens, Click on "+Add Custom Code". Then on the first text field past tabnav AI widget code. On the name "Text field" you can call it Tabnav Widget.
Step
Then, scroll down and select "Body - end", and click "Apply".
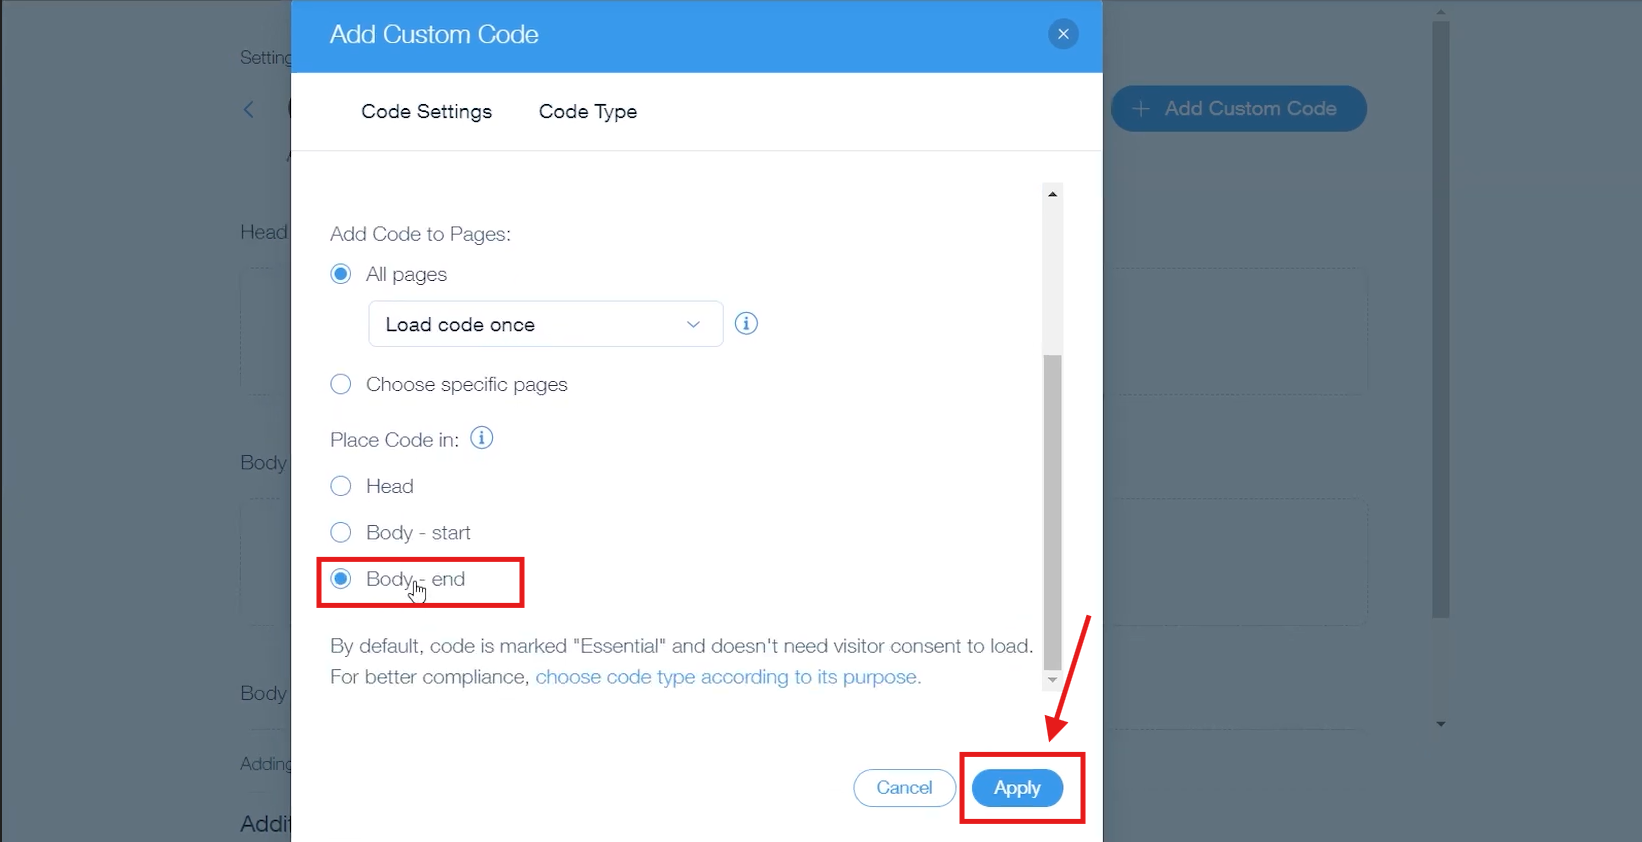
Go to your Wix website to ensure that the tabnav AI widget is available.
Mission Accomplished!
The Tabnav AI Accessibility Widget is now available on your site. Please visit your website and verify its availability. If the widget is not present, please consult the quick checklist below for key points to ensure its availability.
Widget Availability Checklist
If the widget is still unavailable, please contact our support team at support@tabnav.com.